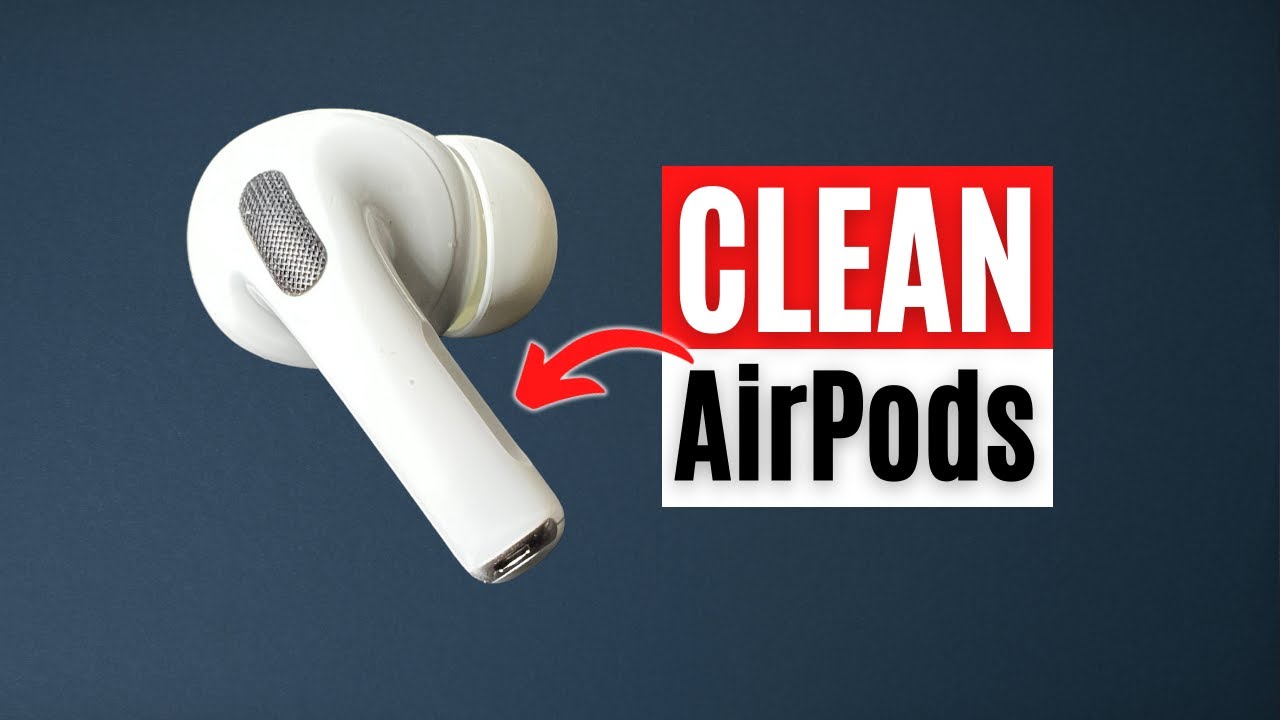
I nearly threw my AirPods Pro in the waste final week. The volume had dropped to a whisper. Each melody sounded like it was playing through a pad. My to begin with intuitive? Crank the volume to max and trust the vibration shakes the garbage loose.
Spoiler: It didn't work. It fair made the suppressed sound louder.
If you are reading this, your AirPods probably sound terrible as well. You have that grayish gunk clogging the AirPod speaker work. You have attempted jabbing it with a toothpick. Maybe you indeed licked it (do not lie, we have all been desperate).
Here is the truth: cleaning how to clean airpod speaker work is sensitive surgery. One off-base move and you thrust the wax more profound, or worse, tear the work. I have repaired earphones for friends for years.
I have seen the repercussions of terrible cleaning endeavors. Let me walk you through the methods that really work, the devices that are worth buying, and the one thing you should never, ever do.
Why Your AirPods Sound Muffled (The Net Truth)?
Before we settle it, let's get it the foe. Your ears deliver wax. It is natural. It is sound. But when you push an AirPod into your ear canal for three hours a day, that wax gets compressed and pushed against the speaker mesh.
Read Also: How Long Does It Take to Charge AirPods Pro from 0 to 100?
Over time, that little metal grind gets put with a layer of ear gunk. It is like putting a sticker over a speaker. The sound waves cannot elude. The bass vanishes. The highs turn to mush.
I see individuals looking for AirPod speaker mesh replacement since they think the portion is broken. 9 times out of 10, the work is fine. It is fair wearing a coat it was never outlined to wear.
The Golden Rule of AirPod Cleaning
If you take nothing else from this guide, remember this: No liquids. No sharp objects. Apple's official documentation warns against using sharp objects or abrasive materials.
I ignored this once. I used a sewing needle to gently scrape the mesh. It felt gentle. It was not. I nicked the membrane. The AirPod never sounded the same again.
Think of the mesh like a drum skin. It needs to vibrate freely. If you dent it or poke a hole in it, the vibration stops. You have turned a $250 device into a paperweight.
1: The Sticky Tack Trick (My Go-To)
This is the method I use on my own AirPods and recommend to everyone. It is safe, it is cheap, and it works.
What you need:
-
Blue Sticky Tack (the stuff you use to hang posters)
-
A clean, soft toothbrush (dry)
-
Bright light
The steps:
-
Roll a tiny ball of sticky tack. Make it smaller than a pea. It needs to be fresh and soft, not dried out.
-
Press it gently against the speaker mesh. Do not jam it. Just make contact.
-
Pull it straight off. Do not twist. Do not drag. Just lift.
-
Inspect the tack. You will see little yellow/brown dots stuck in it. That is the wax.
-
Repeat with a fresh piece of tack until the tack comes away clean.
-
Use the dry toothbrush to very lightly dust off any loose fibers or remaining debris.
I learned this from a watch repair guy who uses it to clean the tiny speakers in hearing aids. It works because the tack grabs the wax without pushing it in. It is the safest way I know to clean AirPods ear wax without damaging anything.
2: The Blue-Tack Alternative (Museum Gel)
If you cannot find standard sticky tack, look for Museum Gel. It is the stuff they use to keep vases from tipping over in earthquakes. Museum Gel is stickier than regular tack but less likely to leave residue.
I tested this on a pair of AirPods that belonged to a friend who runs marathons. His AirPods were crusty with sweat salt and wax. The Museum Gel pulled out chunks that had been lodged in there for months. It felt disgusting. It also felt incredibly satisfying.
You Must Also Like: How to Connect AirPods to Android? Step By Step Guide
Pros: Stronger grip, removes deeper wax.
Cons: Slightly more expensive, harder to find.
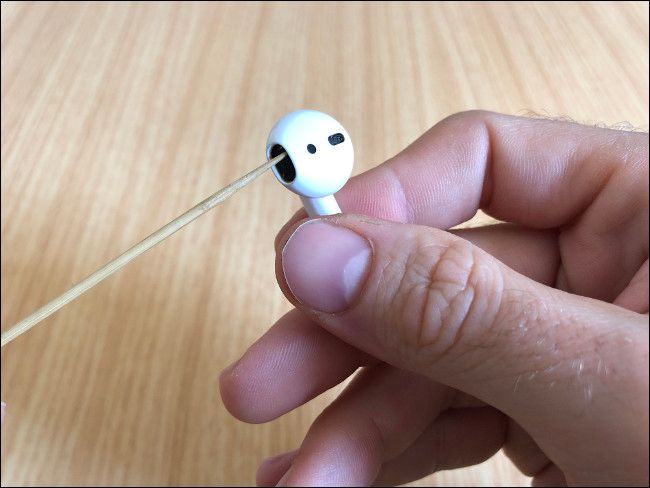
3: The Toothpick Wrap (For Stubborn Clogs)
Sometimes, the wax is not just on the mesh. It is actually packed into the little slit that runs around the edge of the speaker grille. Sticky tack cannot reach that.
What you need:
-
A wooden toothpick
-
A tiny piece of double-sided tape (or a single fiber from a cotton ball)
The steps:
-
Do not use a bare toothpick. The wood is too hard and will scratch the plastic.
-
Wrap the very tip of the toothpick with a microscopic piece of double-sided tape, sticky side out. You want just enough to cover the tip.
-
Alternatively, pull a single wisp of cotton from a cotton ball and twist it onto the toothpick tip.
-
Gently run this along the edge slit where the mesh meets the plastic. The tape or cotton will grab the wax and pull it out.
-
Do not go deep. You are only cleaning the surface edge.
This is the method I use when the how to clean AirPod speaker question comes from someone who has let it go for a year. The buildup along the edges is thick. This method carves it out safely.
The "Blu Tack is King" Test: My Personal Experiment
I wanted to prove which method was best. So I took two pairs of AirPods. Pair A had mild buildup. Pair B was disgusting (borrowed from a heavy user).
On Pair A, I used the dry toothbrush method only. It helped a little. The sound cleared up by maybe 20%. There was still a veil over the music.
On Pair B, I used the Blu Tack method. I did three passes. After the first pass, the sound was 50% better. After the third pass, they sounded almost new.
The difference was night and day. The toothbrush just shuffles dust around. The tack actually removes the thing blocking the sound.
What About Alcohol and Q-Tips?
You will see videos online where people dip a Q-tip in rubbing alcohol and swab the mesh. Please do not do this. Here is why:
-
Alcohol can seep inside. The mesh is not waterproof from that side. If alcohol gets behind the mesh, it can damage the internal components or dissolve the glue holding things together .
-
Q-tips leave fibers. Cotton fibers get caught on the mesh edges. Then you have wax and cotton stuck in there.
-
It pushes wax in. Swabbing with a wet Q-tip often just smears the wax into a thinner, stickier layer that plugs the holes even more.
I tried this once on an old pair of first-gen AirPods. The sound got worse. The moisture made the wax expand and seal the mesh tighter.
Can You Replace the Speaker Mesh?
This is a common search: AirPod speaker mesh replacement. You can buy little kits online with replacement meshes and adhesive. They cost about $10. I have done this. Twice. Here is my honest take.
It is possible, but it is hard.
The handle includes heating the AirPod to soften the stick, prying the ancient work out with a minor device, scratching off the ancient cement, and setting a modern work flawlessly centered.
Who is this for?
-
People who are good at phone repairs.
-
People who have already damaged the original mesh with a needle.
-
People who are okay with the risk of breaking the AirPod completely.
Who is this not for?
-
Anyone with shaky hands.
-
Anyone who still has a working mesh (just clean it instead).
-
Anyone who values their warranty.
If you try this, know that Apple will not repair it if you break it. You are on your own. I succeeded on one AirPod and cracked the plastic on another. It is a gamble.
The Best Tools to Buy (If You Want to Get Serious)
If you clean your AirPods regularly (every few weeks), invest in these tools. They cost less than a coffee run.
-
Tack-U Cleaning Putty: This is basically Blu Tack formulated specifically for electronics. It comes in a little puck. I keep one on my desk.
-
Soft Bristle Brush: A clean, dry, soft toothbrush works. Some people use makeup brushes. The goal is soft bristles that won't scratch.
-
LED Loupe or Magnifying Glass: You need to see what you are doing. Hold the AirPods under a bright light. You will be shocked at the gunk you missed when cleaning in dim light.
Step-by-Step: The Full Cleaning Routine
Here is the exact routine I follow every month. It takes five minutes.
-
Remove the silicone tips (if you have AirPods Pro). Wash these separately with warm water and mild soap. Let them dry completely before reattaching.
-
Inspect the mesh under bright light. Identify the clogged areas.
-
Roll the Blu Tack into a small point.
-
Dab and lift. Repeat 3-4 times, using a fresh spot on the tack each time.
-
Check the edges. If you see wax in the rim, use the toothpick-with-tape method.
-
Dry brush the entire speaker area lightly to remove any dust.
-
Listen to a song. Pick something with high hats or cymbals. You should hear the clarity return.
Common Mistakes That Ruin AirPods
I have collected these from friends who came to me crying after their AirPods died.
Mistake 1: Using a vacuum cleaner.
Someone thought they could suck the wax out. The suction is too strong. It can pull the mesh out of its housing or damage the driver behind it.
Mistake 2: "Just a tiny drop" of water.
Water and electronics do not mix. Even a tiny drop can cause corrosion over time. The speaker holes lead directly to the inside of the device.
Mistake 3: Sharing your cleaning method.
Okay, this is not damaging. But I once told a friend the Blu Tack method. He used regular wall mounting putty that had turned hard. He pressed it so hard he pushed the mesh inward. Now his AirPod has a permanent dent.
Who Should Not Clean Their Own AirPods?
Be honest with yourself. Do not attempt cleaning if:
-
You are prone to heavy hands.
-
You have tried before and made it worse.
-
Your AirPods are still under AppleCare+.
For those people, take them to Apple. Pay the fee. Let a professional with the right tools handle it. It is cheaper than buying new ones.
The "Ear Wax" Factor: Prevention is Easier
You know how you clean your ears with a Q-tip and a few wax comes out? That wax was going to conclusion up on your AirPods later. If you are somebody who produces a part of ear wax, clean your ears frequently (securely, do not go deep) before utilizing your AirPods.
It diminishes the sum of wax that transfers to the mesh. Also, wipe your AirPods down after each workout. Sweat mixed with wax makes a cement-like paste that is much harder to evacuate than dry wax.
The Final Thoughts
The reply to how to clean airpod speaker work is not complicated. It does not require costly machines or perilous chemicals. It requires persistence and the right delicate approach.
The Blu Tack strategy works. It is secure. It is cheap. And it will bring your AirPods back from the dead. Next time your music sounds muffled, do not grab a cut. Do not snatch a bore (yes, somebody inquired me if that would work).
Get a few sticky tack, roll it into a ball, and deliver your AirPods the tender spa day they deserve. Your ears will thank you. Your wallet will thank you. And your AirPods will live to play another 10,000 melodies.