I spent an entire weekend trying to add my mixtapes and live recordings to Apple Music. I wanted to include the scrolling lyrics too. After plenty of trial and error, I figured out what actually works and what is a waste of time. Let me save you the frustration.
The thing about how to add local files to Apple Music is that the basic import is easy. Getting synced lyrics to show up? That takes a few extra steps. But once you get it right, your personal tracks look and feel like official releases.
What Actually Happens When You Add Local Files?
Before we dive into the steps, it helps to understand what Apple Music does with your files.
Related Article: How to Cancel the Apple Music Free Trial? Step By Step Guide
When you add a song from your computer, Apple Music either copies the file to its folder or links to its location. On a Mac, the default setting copies everything. On Windows, it usually links to the original file.
Here is why this matters. If you move a file after adding it and your setup uses references, Apple Music loses track of it. You will see the song in your library, but it won't play. I learned this from a tough time. I reorganized my music folder and lost around 50 tracks.
Step 1: Get Your Files Ready
Apple Music works best with specific file formats. Stick to these:
-
MP3 (most common, works everywhere)
-
AAC (Apple's preferred format, great quality)
-
ALAC (Apple Lossless, for high-quality audio)
-
M4A
If you have FLAC or WAV files, convert them first. WAV files take up too much space and sometimes cause syncing issues. I use a free converter to turn them into AAC files before adding them to Apple Music.
Step 2: Add Local Files on Mac
Open the Music app on your Mac. Go to the top menu and click File > Import. Find your music files and select them. You can also drag and drop files directly into the app window.
Here is a setting I wish I knew about earlier. By default, the Music app copies every file you add into its own folder. This means you end up with two copies of each song—one in your original folder and one in the Music folder. If you have limited storage, you will want to turn this off.
To change it: go to Music > Settings > Files, then uncheck "Copy files added to the library to the content folder." Now when you add files, the app creates a reference. Your files stay where you put them, and no duplicate copies take up your hard drive space.
Step 3: Add Local Files on Windows
If you use Windows, open the Apple Music app or iTunes. Click File in the top-left corner. Then, select "Add File to Library" for individual songs or "Add Folder to Library" for whole folders.
On Windows, Apple Music usually does not create copies of your files. It links to them. This saves space but makes it important to keep your files in the same location. Move them, and the app loses the connection.
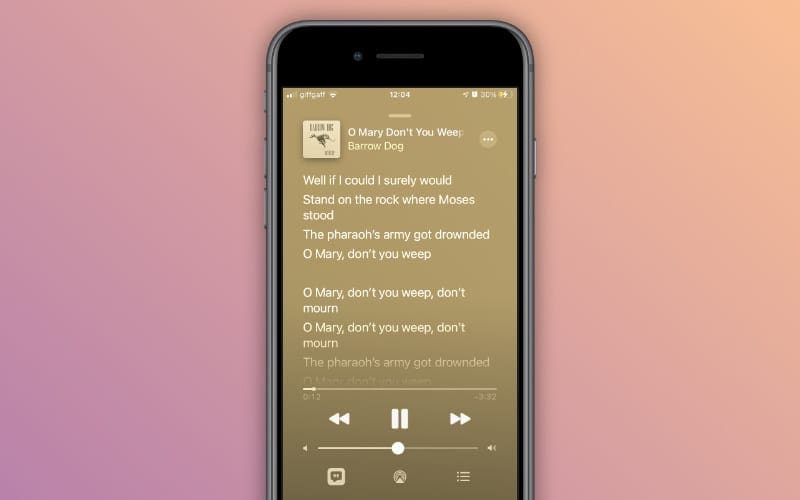
Step 4: The Big One—Getting Synced Lyrics to Work
This is where most guides stop, but you are here for the lyrics, right? Apple Music does not give you a simple button to add synced lyrics. You have to embed them into the actual audio file using a third-party tool.
The official Apple Music app only allows you to add static lyrics. These are plain text that appears but do not scroll with the music. For real-time scrolling lyrics, you need an LRC file. That stands for "lyrics with timestamps." It looks like this:
text:- [00:12.00] First line of the song [00:17.50] Second line of the song [00:21.00] Third line of the song
Each timestamp tells Apple Music when to highlight the next line.
Where to Get Synced Lyrics?
You have three options. You can create them yourself using an LRC editor. You can download them from websites that specialize in lyrics databases. Or you can use an AI tool that generates timestamps automatically.
If you go the manual route, expect to spend about 10 minutes per song getting the timings right. I tried this for three songs and gave up. The AI tools are not perfect, but they save a lot of time.
How to Embed Them?
This part requires a metadata editor. The tool I use is Mp3tag. It is free for both Windows and Mac and handles synced lyrics well. Here is the process:
Open Mp3tag and load your audio file. Find the lyrics field—look for SYLT or synchronized lyrics in the tag options. Paste your LRC content into that field. Save the file.
If you want to get technical, MP3 files use ID3 tags, and M4A files use XMP metadata. The synced lyrics need to go into the SYLT field, not the plain lyrics field. Put it in the wrong spot, and you get static text instead of scrolling lyrics.
After Embedding
Once you have embedded the lyrics, you need to refresh Apple Music. If the track is already in your library, remove it first. Then add the edited file back in.
Go to File > Library > Update Cloud Library to force a sync. This pushes the updated metadata to iCloud so your iPhone and iPad get the new lyrics.
Step 5: Sync Across All Devices
To get your local files on your iPhone or iPad, you need either an Apple Music subscription or iTunes Match.
On your iPhone, go to Settings > Music and turn on Sync Library. On your Mac, go to Music > Settings > General and check Sync Library.
Once enabled, your files upload to iCloud. This can take a while depending on how many songs you have. I added about 200 songs and waited for nearly an hour for everything to sync.
Common Problems and How to Fix Them
Songs Not Showing on iPhone
Ensure that you have turned on Sync Library. Also, verify that you have signed into the same Apple ID on both devices. I once spent an hour troubleshooting before realizing I was on a different account.
Lyrics Show as Static Text Only
You likely used the incorrect tag type. Go back to your metadata editor and make sure you embedded the lyrics in the SYLT (synchronized) field, not the plain text field.
Songs Are Grayed Out
This usually means one of three things. Your subscription expired, Sync Library got turned off during an update. Or the file format is not supported.
Check your subscription status first. Then verify Sync Library is still on. If both look fine, try converting the file to AAC and adding it again.
Music Disappeared After Canceling Subscription
When you cancel Apple Music, you lose access to any songs you added from the streaming catalog. But your own local files should remain available on your computer. If they are not showing up on your iPhone after canceling, you may need to sync manually with a USB cable.
Files Won't Play After I Moved Them
Remember that earlier point about references versus copies? If you moved the original files, Apple Music cannot find them. Put the files back where they were, or remove the songs from your library. Then, add them again from the new location.
Should You Use iTunes Match?
Here is something people often get wrong. If you have an Apple Music subscription, you do not need iTunes Match. Apple Music includes the same upload feature for your personal files.
You only need iTunes Match if you want to sync your local files across devices but don’t want the full Apple Music service. It costs less per year and does one thing: upload your personal music library to iCloud.
File Format Recommendations
If you care about sound quality, use ALAC for your local files. It is lossless, meaning no quality is lost from the original CD or recording. The trade-off is larger file sizes.
If storage space is tight, stick with AAC at 256 kbps. Most people can't tell the difference between this and lossless when they listen. Whether in the car, on headphones, or through a Bluetooth speaker, it sounds similar.
Final Thoughts
Adding local files to Apple Music is straightforward once you know the steps. Getting synced lyrics to work takes more effort, but the result is satisfying. Your personal tracks look like they belong in the official catalog. Key takeaways:
-
Use supported file formats.
-
Embed lyrics with a tool like Mp3tag.
-
Enable Sync Library on all your devices.
If you only want the basic how to add local files to Apple Music experience without the lyrics, drag and drop into the app. That takes about ten seconds per song.